


Published: | Last Updated:
A Step-by-Step Blender Guide for Beginners
Mastering Blender: A Step-by-Step Blender Guide for beginners
Introduction Blender is a powerful, open-source 3D creation suite that has become increasingly popular among digital artists, animators, and game developers. Whether you're looking to create stunning 3D models, animations, or even entire scenes, Blender offers a comprehensive set of tools to bring your ideas to life. However, for beginners, the software can seem daunting due to its extensive features and complex interface. This guide will walk you through the basics of using Blender, from understanding the interface to creating your first 3D model.how to Use Blender Step by Step
Blender is a powerful 3D creation suite that supports the entire 3D pipelinemodeling, sculpting, texturing, animation, rendering, and more. This guide aims to provide a deep dive into Blender, breaking down the process into manageable steps for beginners and intermediate users. By the end of this guide, you should have a solid understanding of Blender's interface, tools, and workflow.1. Installing and Setting Up Blender
1.1 Downloading Blender- Visit the and download the latest version.
- Choose the appropriate installer for your operating system (Windows, macOS, or Linux).
- Follow the installation instructions provided on the website.
- Open Blender: Once installed, open Blender. You'll be greeted with the default startup file, which includes a cube, a light, and a camera.
- Adjust Preferences: Go to
Edit Preferencesto customize Blender to your liking. Here, you can adjust settings like input (mouse and keyboard), themes, and add-ons. - Save Startup File: If you make changes to the layout or preferences that you want to keep, go to
File Defaults Save Startup File. This will save your current configuration as the default every time you open Blender.
2. Understanding Blender's Interface
2.1 Overview of the Interface Blender's interface can be broken down into several key areas:- 3D Viewport: This is where you'll spend most of your time, manipulating objects and viewing your scene in 3D.
- Toolbar (on the left): Contains tools for object manipulation, like move, rotate, and scale.
- Outliner (top-right corner): Shows a hierarchical view of all objects in your scene.
- Properties Panel (bottom-right corner): Where you can adjust object properties, materials, textures, modifiers, and more.
- Timeline: Used primarily for animation, this is where you can set keyframes and control playback.
- Splitting and Merging Windows: You can split any window in Blender by right-clicking on the edge and selecting "Split Area." This is useful for viewing multiple panels at once, such as having a 3D Viewport and a Shader Editor open simultaneously.
- Creating Custom Workspaces: Blender comes with several pre-configured workspaces (Modeling, Sculpting, UV Editing, etc.), but you can create your own. To do this, click the
+button next to the workspace tabs and select "Duplicate Current" to create a custom workspace.
- Orbiting: Middle mouse button (MMB) or
Alt + Left Mouse Button (LMB)on Mac. - Panning: Shift + MMB.
- Zooming: Scroll wheel or
Ctrl + MMB.
G: Grab (Move)R: RotateS: ScaleTab: Toggle between Object Mode and Edit ModeCtrl + Z: Undo
3. Basic object manipulation
3.1 Adding and Removing Objects- Adding Objects: Press
Shift + Ato bring up the Add menu. Here you can add basic primitives like cubes, spheres, and planes. These are the building blocks of your models. - Deleting Objects: Select an object and press
Xto delete it.
- Move: Select an object, press
G, and move your mouse. You can constrain movement to an axis by pressingX,Y, orZafterG. - Rotate: Press
Rto rotate the object. Like with movement, you can constrain rotation to an axis. - Scale: Press
Sto scale the object uniformly. To scale along a specific axis, pressX,Y, orZafterS.
Move, Rotate, or Scale icons in the toolbar.
4. Working with Edit Mode
4.1 Entering Edit Mode- Select an object and press
Tabto enter Edit Mode. This mode allows you to manipulate the individual vertices, edges, and faces that make up the geometry of your object.
- Vertices: Press
1or click the vertex selection icon to select individual vertices. - Edges: Press
2or click the edge selection icon to select edges. - Faces: Press
3or click the face selection icon to select faces.
- Extrude: Select a face, edge, or vertex, and press
Eto extrude it, creating new geometry. - Inset: Press
Ito inset a face, creating a smaller face within the original.
- Press
Ctrl + Rto activate the Loop Cut tool. This allows you to insert new edge loops into your mesh, which is essential for adding detail and refining the shape of your model.
- Proportional Editing lets you transform selected components while affecting nearby geometry in a smooth, falloff manner. Toggle it with
O, and use the scroll wheel to adjust the influence radius.
5. Applying Modifiers
5.1 What Are Modifiers? Modifiers are operations that automatically affect an object's geometry without permanently changing it. They are non-destructive, meaning you can adjust or remove them at any time. 5.2 Common Modifiers- Subdivision Surface: Smooths the object by subdividing its geometry.
- Mirror: Creates a symmetrical duplicate of the object along an axis. This is useful for modeling symmetrical objects like faces or vehicles.
- Bevel: Rounds the edges of the object, giving it a more polished appearance.
- Array: Duplicates the object multiple times in a specified direction.
- Go to the Modifier tab in the Properties panel, click
Add Modifier, and select the desired modifier. - Adjust the settings as needed. For example, with Subdivision Surface, you can control the number of subdivisions to smooth the object.
- If you're satisfied with the result, you can apply the modifier by clicking
Apply. Note that this will make the changes permanent.
6. Creating and Applying Materials
6.1 Understanding Materials Materials define the appearance of an object, including its color, reflectivity, and transparency. Blender uses a node-based system for creating complex materials. 6.2 Applying a Basic Material- Select your object and go to the Material tab in the Properties panel.
- Click
Newto create a new material. - Adjust basic properties like Base Color, Roughness, and Metallic to get the desired look.
- For more complex materials, open the Shader Editor by splitting your viewport and selecting Shader Editor from the dropdown menu.
- Nodes represent different material properties and textures. The default setup includes a
Principled BSDFnode connected to theMaterial Output. - Add new nodes like
Image TextureorMix Shaderto enhance your material.
- UV Mapping is the process of projecting a 2D texture onto your 3D model. In Edit Mode, press
Uto bring up the UV mapping options. - You can unwrap your model's geometry onto a 2D plane, allowing you to apply textures accurately.
7. Lighting and Camera Setup
7.1 Adding and Adjusting Lights- Types of Lights: Blender offers different types of lightsPoint, Sun, Spot, and Area. Each type has unique properties suited for different scenes.
- Adding Lights: Press
Shift + Aand select Light. Choose the type of light you want to add. - Adjusting Light Properties: Select the light, go to the Light tab in the Properties panel, and adjust properties like power, color, and shadow settings.
- Adding a Camera: If a camera isn't already in your scene, press
Shift + Aand select Camera. - Camera View: Press
Numpad 0to switch to the camera view. You can move and rotate the camera using theGandRkeys. - Locking Camera to View: In the View panel (
Nkey in the 3D Viewport), check "Lock Camera to View" under the View tab. This allows you to move the camera using regular viewport navigation.
- In the Camera tab, you can enable Depth of Field and adjust the focus distance to achieve a cinematic effect.
8. Rendering Your Scene
8.1 Choosing a Render Engine- Eevee: A real-time render engine that is fast and suitable for previewing scenes or producing less resource-intensive renders.
- Cycles: A ray-tracing render engine that produces more realistic results but requires more computational power.
- Go to the Render tab in the Properties panel to adjust settings:
- Resolution: Set the resolution of your final image.
- Sampling: Controls the quality of the render. Higher samples produce better results but take longer to render.
- Output Format: Choose whether to render an image (PNG, JPEG) or an animation (AVI, MP4).
- Press
F12to start rendering. Blender will create a 2D image from your 3D scene based on the camera's view. - Render Animation: If you're rendering an animation, go to
Render Render Animationor pressCtrl + F12.
- Once the render is complete, go to
Image Save Asto save your render. For animations, Blender will save each frame in the output directory you specified in the Output settings.
9. Exporting Models and Scenes
9.1 Exporting Models- To export your model for use in other software or as part of a game, go to
File Exportand choose from various formats (OBJ, FBX, STL, etc.). - Adjust export settings according to your needs, such as scale, axis orientation, and whether to include materials and textures.
- If you need to export an entire scene, including lighting, cameras, and animation data, formats like FBX or Alembic are suitable.
- For web applications or simple sharing, consider exporting to the glTF format, which is optimized for web use.
10. Continuing Your Blender Journey
10.1 Exploring Advanced Features- Sculpting: Dive into Blender's Sculpting mode for high-detail organic modeling.
- Animation: Use the Timeline and Graph Editor to create keyframe animations and bring your models to life.
- Physics Simulations: Experiment with Blender's physics engines to create simulations involving fluids, cloth, smoke, and rigid bodies.
- Blender Documentation: The is a comprehensive resource for understanding all aspects of the software.
- YouTube Tutorials: Channels like Blender Guru and CG Geek offer free tutorials ranging from beginner to advanced levels.
- Online Courses: Platforms like Udemy and Coursera offer structured courses that can help you deepen your understanding of Blender.
Is Modeling in Blender Hard?
Blender's learning curve can be steep for beginners, but the difficulty of modeling largely depends on the complexity of the model you wish to create and your familiarity with the software. For basic models, Blender offers a straightforward workflow with plenty of resources available to guide you. As you progress and aim to create more intricate designs, you'ii encounter advanced tools and techniques that require practice and patience. Challenges in Blender Modeling:- Understanding Geometry: Knowing how to manipulate vertices, edges, and faces is essential. Mistakes in topology (the structure of your 3D model) can lead to issues in rendering and animation.
- Modifiers and Tools: With a vast array of modifiers and modeling tools, knowing when and how to use them effectively takes time and experimentation.
- Practice Regularly: The more you practice, the more intuitive Blender will become.
- Use Reference Materials: Tutorials, online courses, and Blender's official documentation are invaluable resources.
- Join the Community: Blender has a large and active community where you can seek advice, share your work, and learn from others.
Can You Get Models on Blender?
Yes, Blender provides several ways to acquire models: 1. Blender's Built-in Add-ons:- Blender comes with several add-ons that provide pre-made models and assets. For example, the "BlenderKit" add-on offers a library of free and paid models, materials, and brushes directly within Blender.
- Blender Market: A popular marketplace where artists sell high-quality models, materials, and add-ons specifically designed for Blender.
- TurboSquid: Offers a vast selection of 3D models, some of which are free, but many are paid.
- Sketchfab: A platform where you can find 3D models uploaded by other users. Some models are free, while others require payment.
- If you have models in other formats (like OBJ, FBX, or STL), you can easily import them into Blender. Simply go to
File Importand select the appropriate format.
How to Render a 3D Model in Blender
Rendering is the process of converting your 3D scene into a 2D image or animation. Blender offers two main render engines: Eevee and Cycles. 1. Choose a Render Engine:- Eevee: A real-time render engine that's fast and suitable for previewing scenes and creating less resource-intensive renders.
- Cycles: A physically-based path tracer that produces more realistic results but requires more computational power.
- Before rendering, ensure that your lighting, camera, and materials are properly configured.
- Go to the Render tab in the Properties panel to adjust settings like resolution, sampling rate, and output format.
- Press
F12to render the scene. Depending on the complexity, this may take some time.
- Once the render is complete, go to
Image Save Asto save your image.
How to Model with Blender for Beginners
1. Start with Simple Shapes:- Begin with basic primitives like cubes, spheres, and cylinders. Practice moving, rotating, and scaling these shapes to form more complex models.
- Extrusion is a key technique in Blender. By selecting a face and pressing
E, you can extrude it to add more geometry to your model.
- Apply simple modifiers like Subdivision Surface to smooth your model or Mirror to create symmetrical objects.
- Blender's Sculpting mode allows you to add fine details to your model, much like working with digital clay.
- If you're modeling something specific, import reference images into the background of your viewport to guide your work.
How to Model in Blender Using a Picture
Using a reference image is a common technique in Blender modeling, especially for achieving accuracy. 1. Import the Reference Image:- Go to
Add Image Referenceand select your image file. This will place the image in your 3D Viewport.
- Position the reference image in the desired view (front, side, or top). You can lock it to one of these views for easier modeling.
- Use the reference image as a guide while you create and adjust your mesh. This is particularly useful for character modeling, architectural models, and product designs.
- Often, you'ii need multiple reference images (front and side views) to model accurately. You can add additional images and switch between them as needed.
- Continuously compare your model to the reference image, adjusting vertices, edges, and faces to match the picture as closely as possible.
Conclusion
Blender is a versatile tool that can be mastered with dedication and practice. Whether you're a beginner or an experienced artist, understanding the basics of Blender will set you on the path to creating stunning 3D models and animations. From simple object manipulation to complex rendering, this guide provides the foundational knowledge needed to get started with Blender and explore its full potential.Recommended for You

How To Start Affiliate Marketing With No Money
Introduction to affiliate marketing Starting affiliate marketing with no money requires creativity,…
7 Proven Strategies to Make Money Online: A Step-by-Step Guide for Beginners
7 Proven Strategies to Make Money Online: A Step-by-Step Guide for Beginners The digital age has…You Might Enjoy

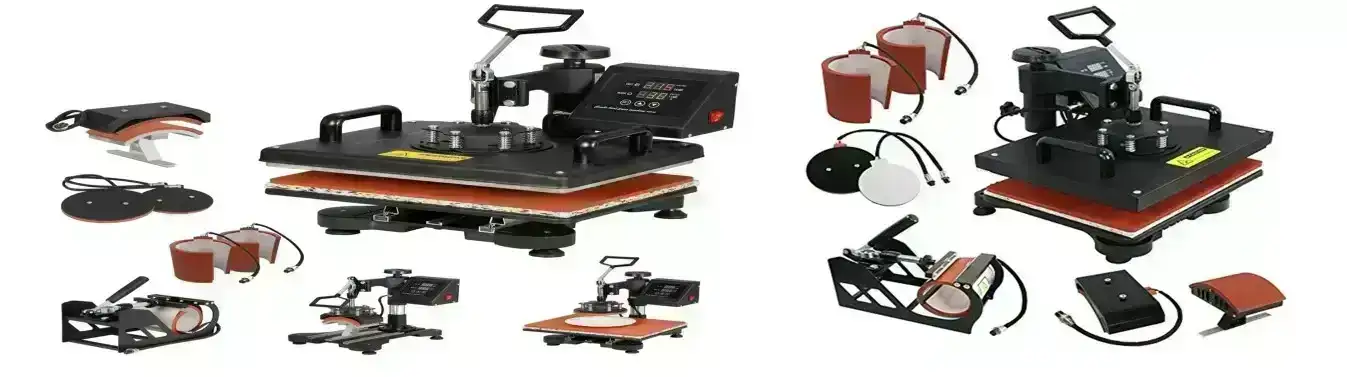
Earning Money With a Heat Press Machine
Earning Money With a Heat Press Machine When it comes to earning money with a heat press machine it…
How to Earn Money with LeadsLeap
How to Earn Money with LeadsLeap Signup-For-Leads-Leap-Account Are you in search of new…
The Ultimate Guide to Choosing the Perfect Hosting Service Provider
Choosing the Perfect Hosting Service Provider Selecting the right hosting service provider is…More Reads You’ll Love

Website Monetisation: The Complete Guide to Earning from Your Online Platform
Have you ever wondered how to turn your website into a revenue-generating machine ? You're not…
Best House Painting Ideas by Painting Contractor San Francisco
Residential and Commercial Painting Companies in America: A Comprehensive Guide Painting is a…
Importance Of Sitemaps
The Ultimate Guide to XML Sitemaps: Purpose, Limitations, and SEO Benefits Creating a…Other Topics That Might Interest You
Heat Press Machine Printing
How to do Heat Press Machine Printing Heat Press Machine Printing is a kind of printing used to…
Abstract Art Painting
Abstract Art Painting: A Comprehensive Exploration Introduction to Abstract Art: A Journey Beyond…
32 Tips On Keyword and Niche Research
A Comprehensive Guide to Keyword and niche research Introduction: In the expansive realm of search…Other Topics You May Be Interested In


Traffic Coop Earnings
Ready to Monetise Your Traffic?
Stop letting your visitors slip away without value. With the LeadsLeap Co-op, you can turn every click into income. Join through my link below and I’ll personally share my tips for getting started fast.
🚀 Join My LeadsLeap Co-op Now*Referral disclosure: I may earn a commission when you sign up through this link. There’s no extra cost to you — your support helps keep this site alive.

Comments